Astro... Let's go!
This is Part 1 of a series I'm writing on Astro applications. A basic understanding of React will help but is not necessary.


Table of contents
Astro.build is an online platform that offers a wide range of tools and resources for developers, designers, and content creators looking to build high-quality websites quickly and easily. It has great resources on astro.build including thorough documentation, which provides an introduction to the popular static site generator.
For those unfamiliar with the term, a static site generator is a tool that allows you to create a website without needing a server or database to run it. Instead, the site is generated ahead of time and served as a collection of static files. This can lead to
faster load times
improved security
easier deployment
Astro is a static site generator that takes this concept even further by allowing you to build websites using familiar technologies like HTML, CSS, and JavaScript, while still offering the performance and security benefits of a static site.
Nothing short of a fantastic platform for anyone looking to build fast, secure, and scalable websites using the latest web development technologies, Astro is gaining popularity as devs can bring the tools and frameworks they love along with them!
Here are some key points about Astro and why it's so popular:
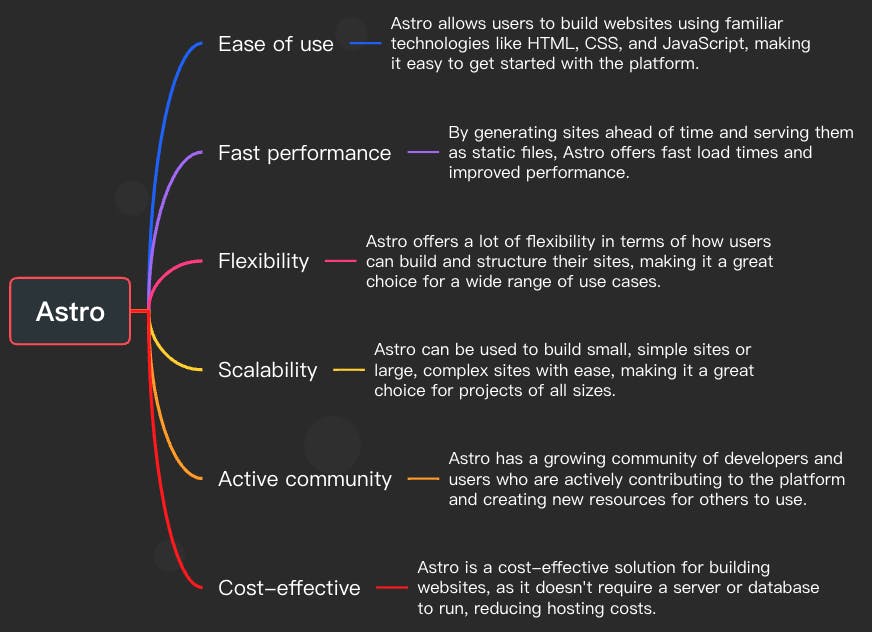
As you can see, Astro offers a lot of benefits for those looking to build high-performance, scalable websites using modern web development tools. With its ease of use, fast performance, flexibility, and active community, it's no wonder why Astro is becoming increasingly popular among web developers and designers.
Let's build a quick Astro site and integrate two React components. Let's go!
Quick Astro Project
- Open your terminal and create a new Astro project using the following command:
npm init astro my-app
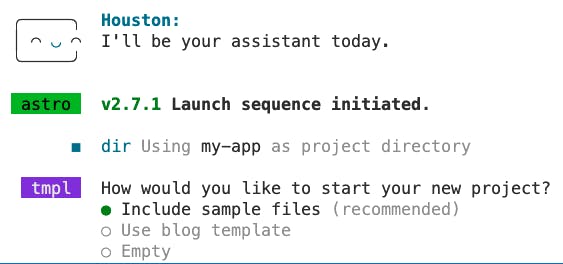
You will see Houston assisting with the build and asking "How would you like to start your new project?" Choose the recommended option, "Include sample files" by pressing ENTER.
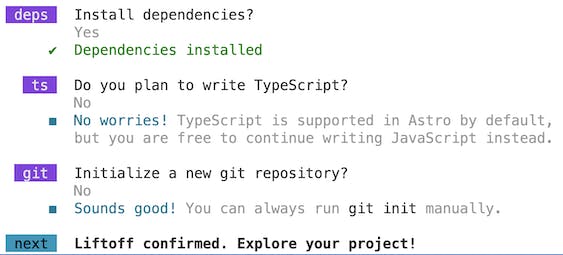
Other questions Houston asks are whether or not we want dependencies and if we are using TypeScript. Answer YES (y), then NO (n), as shown.
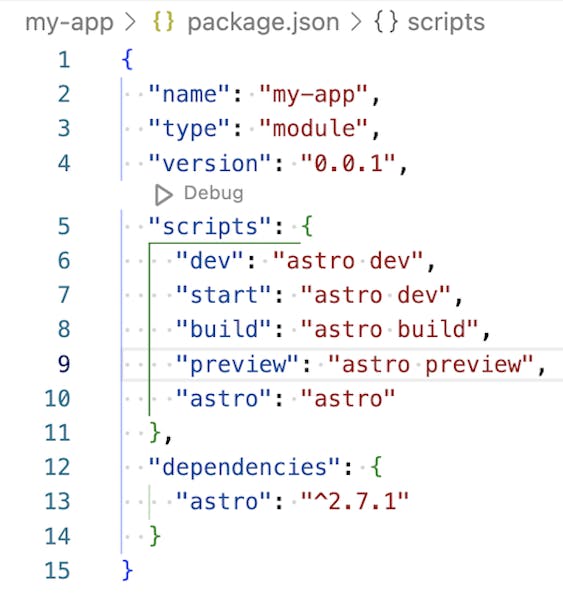
This will create a new directory called my-app and initialize it with an Astro project. Here is what your package.json should look like once this step is complete.
- Install more necessary dependencies:
react,react-dom, and@mdx-js/react:
npm install react react-dom @mdx-js/react @astrojs/react
- Erase the contents in
index.astroand paste in the following code. You can delete all other files in the pages directory as well.
# src/pages/index.astro
---
import ComponentA from '../components/MyComponents/ComponentA.jsx';
import ComponentB from '../components/MyComponents/ComponentB.jsx';
---

<>
  <ComponentA />
  <ComponentB />
</>
- Now we will create two Astro components with different functionality. Use the following command to create a new directory,
src/components, calledMyComponents. Now inside this directory, create two new files:ComponentA.jsxandComponentB.jsx.
cd components && mkdir MyComponents $$ touch ComponentA.jsx ComponentB.jsx
The command above is the same as running each of the commands one at a time, as most are probably more used to doing:
mkdir src
cd src
mkdir components
cd components
touch ScriptComponents.astro TemplateComponent.astro
- In
ComponentA.jsx, write the following code:
// src/components/MyComponents/ComponentA.jsx

import React from 'react';

function ComponentA() {
  return (
    <div>
      <h2>Component A</h2>
      <p>This is Component A</p>
    </div>
  );
}

export default ComponentA;
- In
ComponentB.jsx, write the following code:
// src/components/MyComponents/ComponentA.jsx

import React from 'react';

function ComponentB() {
  return (
    <div>
      <h2>Component B</h2>
      <p>This is Component B</p>
    </div>
  );
}

export default ComponentB;
- One last thing we need to do is add our integrations in the
astro.config.mjsfile:
import {defineConfig} from 'astro/config';
import installedIntegration from '@astrojs/react';

export default defineConfig({
  integrations: [
    installedIntegration(),
  ]
})
- Now you can run your Astro app using the following command:
npm run start
This will start a development server and open your app in the browser. You should now see the following when you run the app.
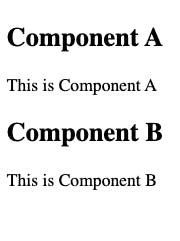
That is it! Congratulations on building an app in Astro with React component integration. Now let's build on this app and add some templates.
Enjoy and never hesitate to hit me up with questions, comments, jobs, or anything tech related!!! Please ❤️ if you find value and subscribe to the newsletter for more articles about React, Web Development, AI-Language Models (ChatGPT), React Native, Typescript, TailwindCSS, Tutorials, Learning Aids, and more!!!